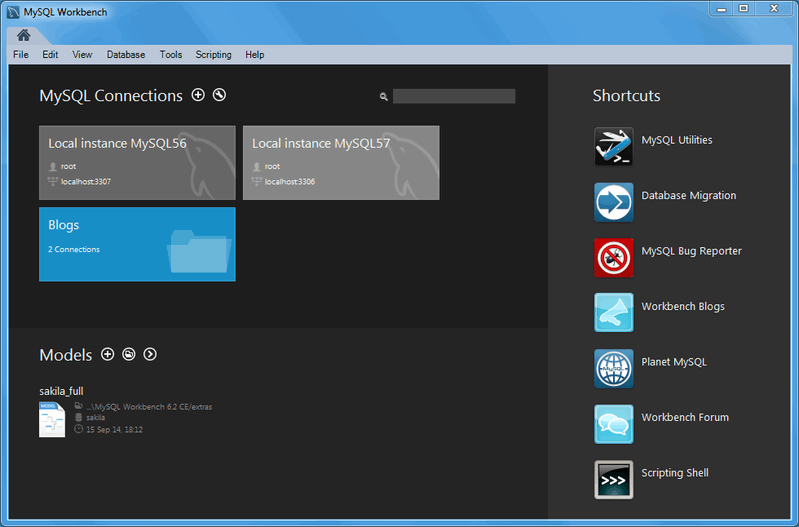
This is the first page you see when opening MySQL Workbench, and it is central to starting MySQL Workbench operations. The three main sections include the MySQL Connections, MySQL Workbench Models, and external Shortcuts.
- Note
- In MySQL Workbench 5.2 and below, the home screen was different and broken up into sections titled SQL Development, Data Modeling, and Server Administration. For additional information about this change, see Section 1.1.4, “New in MySQL Workbench 6.0”.
Most MySQL Workbench functionality, such as the SQL editor and MySQL server manager, begin with opening a MySQL connection from the home screen.

MySQL Connections
This section lists connections to all of your MySQL servers, and allows you to load, configure, group, and view information about each MySQL connection. For more information, see Chapter 5, MySQL Connections and Section 5.2, “Creating A New MySQL Connection (Tutorial)”.
The method to view connection information depends on the operating system.
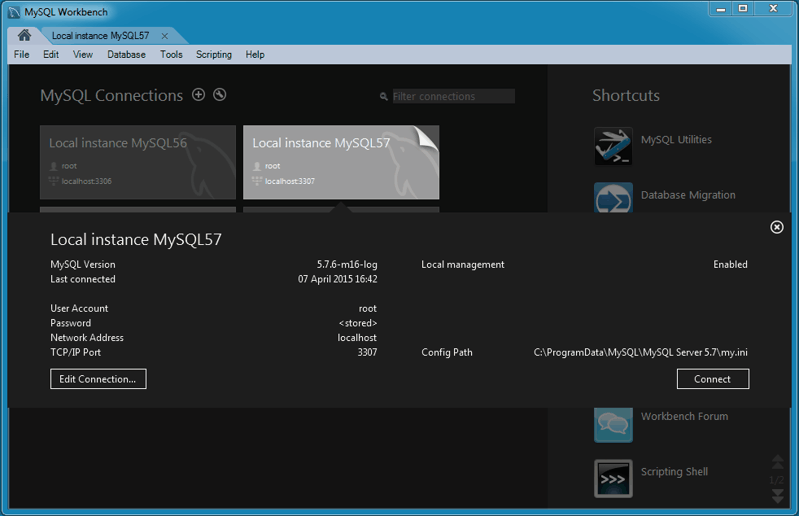
On Microsoft Windows and Linux: hover over the right side of a connection title and click the title
On OS X: hover over a connection title and click the little (i) in appears in the bottom right corner
The information will be displayed under the connection tiles, and will appear similar to:

You may also create groups of connections. Create a group by either right-clicking a connection and choosing the Move to group… context menu option, or you may prefix your connection name with the group name separated by a forward slash (for example, “QA/TestBox”) when you create or configure the connection.
The Models panel your most recently used models. Each entry lists the date and time that the model was last opened, and its associated database. For further information about modeling, see Chapter 9, Database Design / Modeling.
To the right of the Models title are three icons. The (+) adds a new model, the (folder) opens an existing model from the disk, and the (>) opens a context menu for additional commands, such as Create EER Model from Database.
Most of the options you can select on the home screen are straight-forward – the ones that require explanation are detailed after the screenshot. Here is a quick overview of the simpler options that open your web browser to display information about
MySQL Utilities: If the MySQL Utilities are installed, this opens the mysqluc utility. For additional information, see Appendix F, MySQL Utilities.
Database Migration: Opens the migration wizard. For additional information, see Chapter 10, Database Migration Wizard.
MySQL Bug Reporter: Lets you file a bug report in the MySQL bug system. For additional information, see Appendix D, How To Report Bugs or Problems.
Workbench Blogs: Directs you to the Workbench team’s blog.
Planet MySQL: Points you to the general MySQL blog aggregator.
Workbench Forum: Sends you to the user forums where you can ask questions and interact with other MySQL Workbench users.
Scripting Shell: Execute Python scripts and develop MySQL Workbench plugins.
Oracle eDelivery: Sends you to your MySQL Workbench downloads (Commercial).
Oracle Support: Sends you to your MOS (My Oracle Support) page (Commercial).